In the previous post, we have discussed about Configuring SRM folder mapping. In this post, we will discuss about SRM network mapping. One of the important step in SRM inventory mappings. Network mapping needs to configured properly. If you don’t get this configured correctly, the VMs that are powered on at the Recovery Site might not be accessible across the network. SRM Network mapping can only be related to Virtual machine port groups.You cannot map management network or VMkernel port groups.You need to more cautions with network mappings on recovery site because Site Recovery manager does not validate whether the port group that you map is correct portgroup or not. I would recommend you to create the similar Port groups names with some prefix like Prod_ or DR_ in the virtual machines Port group in protected site and recovery site. It will help you to easily configure the network mappings.
Configuring SRM Network Mapping
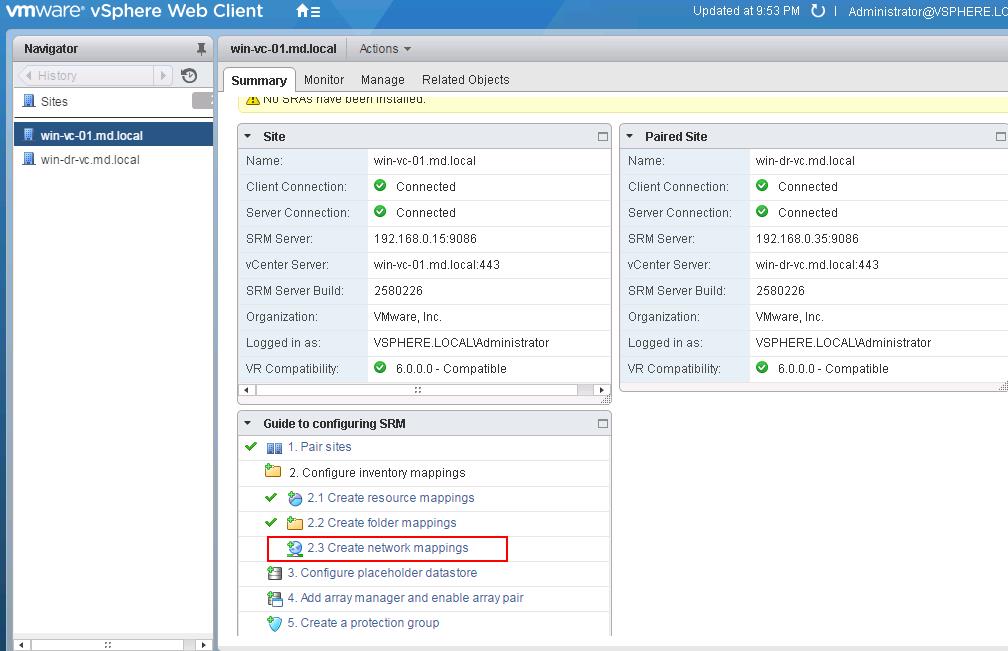
To configure the network mapping, Login to your Protected vCenter server using vSphere Web client and click on SRM in the home page, Select Protected site vCenter in the list and Select Configure Network mapping under inventory mapping.
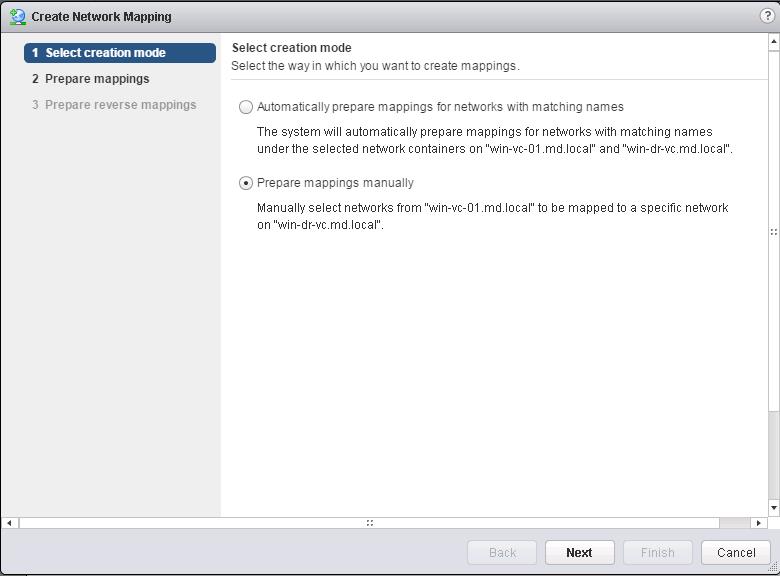
There are two options to configure the network mapping first one is automatically prepare mappings for networks with matching names and second one is prepare mappings manually. I want to configure the networks mapping manually between protected site and recovery site.
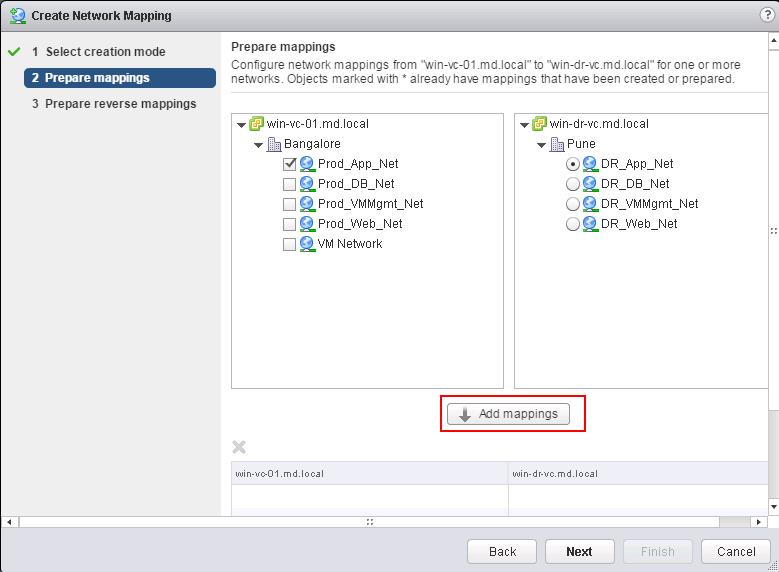
As i recommended earlier, it would be best to name your port which can be easliy identify from the port group names. I have named production network with prefix Prod_ and recovery site network with the prefix DR_. Select the network from the protected site in the left side and select the appropriate network port group in the recovery site and Click on Add mappings.
Similarly configure the network mappings between protected site and recovery site networks and click on next.
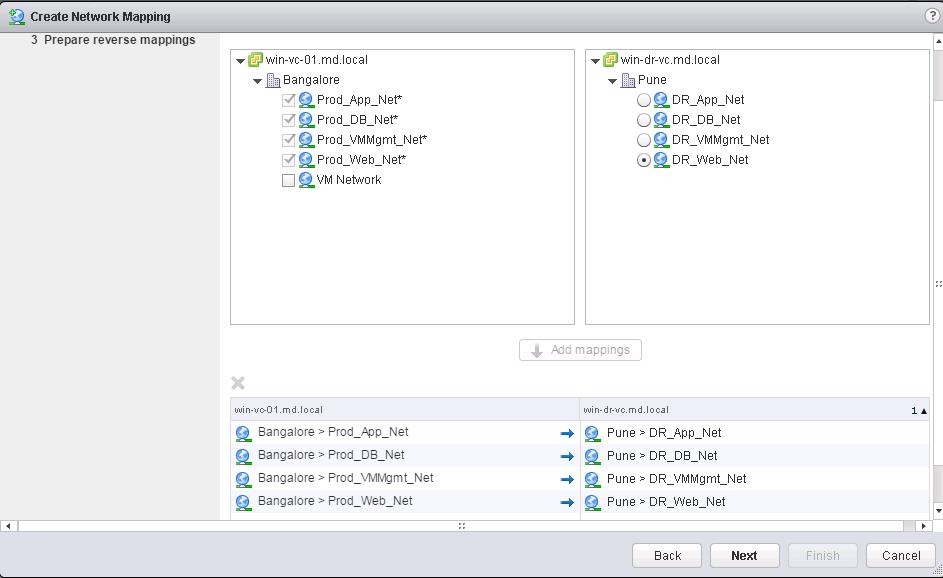
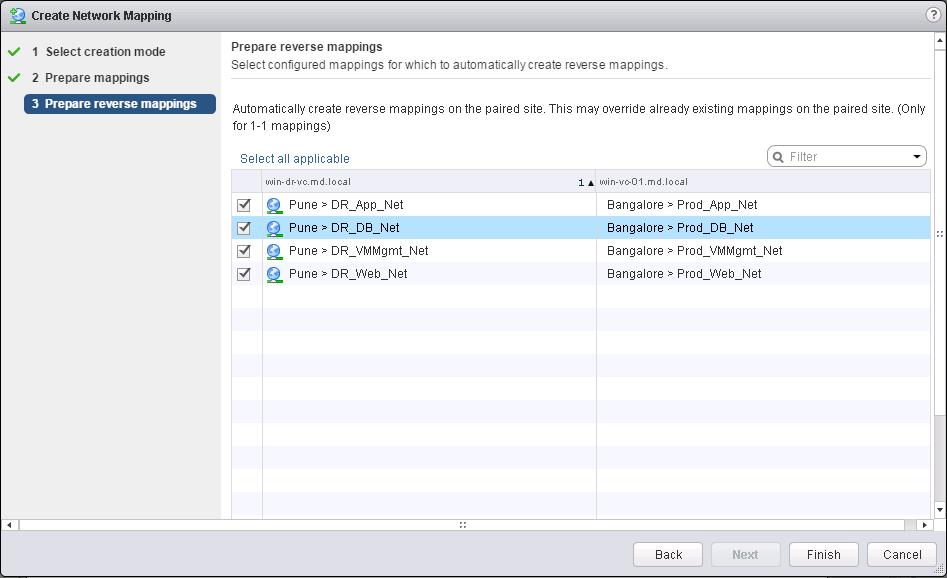
Select all applicable to configure the reverse mapping for the paired site. Which creates the network mapping between DR site and protected site. Click on Finish.
Once network mappings are created, you will be able to view and edit the network mappings under manage -> Network mappings.
That’s it. We are done with configuring Site Recovery Manager Network mapping. In the upcoming posts, we will discuss about configuring Placeholder datastore. I hope this is informative for you. Thanks for Reading!!!. Be Social and share it in social media, if you feel worth sharing it.
Disaster Recovery :
VMware Site Recovery Manager (SRM 6.0) Part 1- Overview and Architecture
VMware Site Recovery Manager (SRM 6.0) Part 2 – VMware SRM 6.0 installation
VMware Site Recovery Manager (SRM 6.0) Part 3 – Configuring SRM Site Pairing
VMware Site Recovery Manager (SRM 6.0) Part 4 – Installing Storage Replication Adapters (SRAs)
VMware Site Recovery Manager (SRM 6.0) Part 5 – Configuring SRM Array Manager
VMware Site Recovery Manager (SRM 6.0) Part 6 – Creating SRM Resource Mappings
VMware Site Recovery Manager (SRM 6.0) Part 7 – Configuring SRM Folder Mapping
VMware Site Recovery Manager (SRM 6.0) Part 9 – Configuring SRM Placeholder Datastores
VMware Site Recovery Manager (SRM 6.0) Part 10 – Creating SRM Protection Group
VMware Site Recovery Manager (SRM 6.0) Part 11 – Creating SRM Recovery Plans
VMware Site Recovery Manager (SRM 6.0) Part 12 – Running SRM Test Recovery
VMware Site Recovery Manager (SRM 6.0) Part 13 – Cleaning up Test Recovery
SAN Replication :
VMware SRM 6.0 Array Based Replication Part 1 – Deploying HP Store Virtual VSA
VMware SRM 6.0 Array Based Replication Part 3 – Configuring HP StoreVirtual VSA Management Group
VMware SRM 6.0 Array Based Replication Part 5 – Configuring HP StoreVirtual VSA Replication


