NSX-T Manager is a standalone appliance that includes the management plane, control plane, and policies. We can deploy up to 3 NSX-T Manager Nodes and create the NSX-T Management cluster to provide high availability and scalability of all services.
One manager node will be elected as the leader Out of 3 NSX-T managers which is part of the NSX-T Management cluster. We also associate a single Virtual IP address to the NSX-T Manager cluster.
The elected leader will be attached to the assigned virtual IP. Traffic to the virtual IP address is load balanced to multiple NSX-T Manager Nodes.
we all know how to deploy NSX-T Manager. We deploy the first NSX-T Manager mode from the OVF file. Once the first NSX-T Manager is deployed, we have the option to deploy additional NSX-T Manager from the NSX-T Manager UI.
What about removing the additional NSX-T Manager?. Yes, we can remove the NSX-T Manager which was deployed after the first NSX-T Manager from UI as well.
What about removing the NSX-T Manager which was deployed first manually from the OVF file? We don’t have the option to remove the NSX-T Manager UI.
Then how to remove the first deployed NSX-T Manager from the NSX-T Manager Cluster.?
In this article, I will explain the detailed step by step procedure to manually remove the NSX-T Manager from NSX-T Manager Cluster which was deployed first using OVA.
How to Remove NSX-T Manager from NSX-T Manager Cluster?
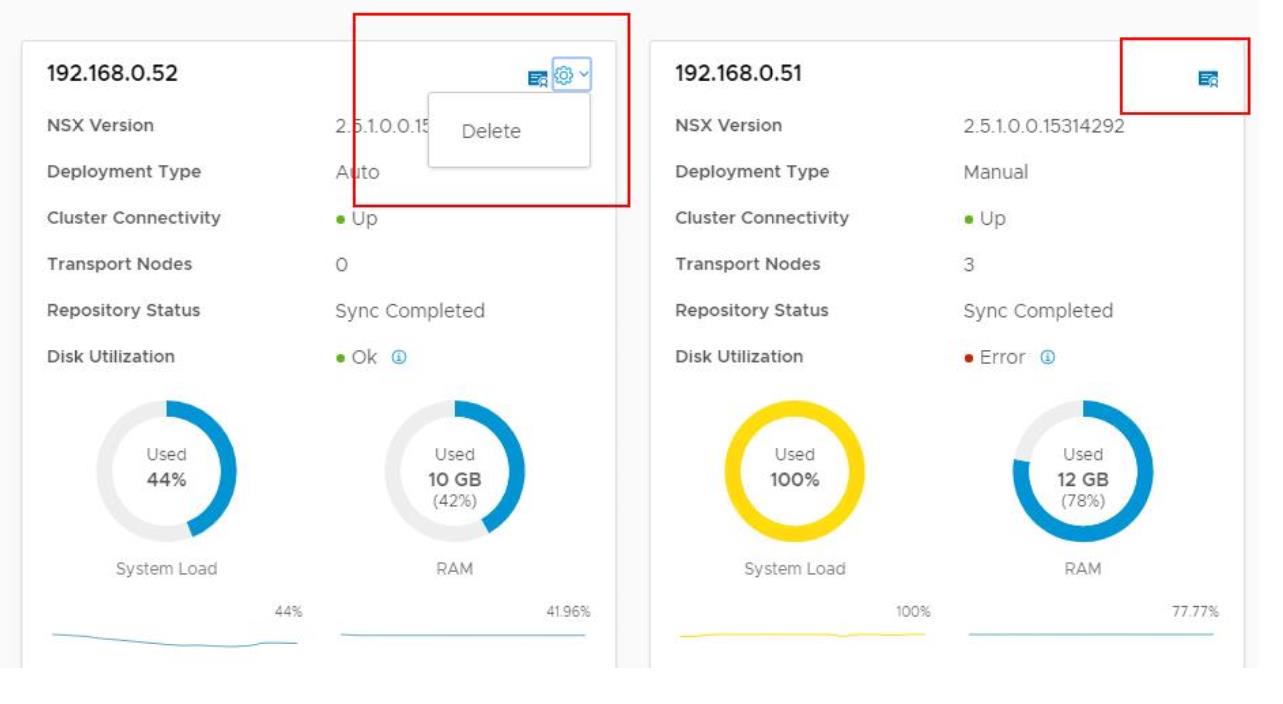
Login to NSX-T Manager UI (via VIP address of the NSX-T Manager) -> System -> Appliances
You could see the difference between the First NSX-T Manager and the second one from the deployment type. The first NSX Manager which deployed via OVF will show the deployment type as “Manual” and the second one which we deployed from NSX-T UI will show the deployment type as “Auto”
“Delete” option is not available from the NSX-T Manager UI for the NSX-T Manager instance (Deployment Type = Manual) which was deployed first manually via the OVF file. The same “Delete” is available for another NSX-T Manager instance with deployment type as “Auto” (deployed from NSX-T Manager UI).
Ok then how to remove NSX-T Manager from NSX-T Manager cluster?. It is still possible to do it from the NSX-T Manager command line. let’s take a look at how to do that.
We understand that we can remove the NSX-T Manager from the NSX-T Manager cluster from the command line. We need to manually detach the NSX-T manager from the cluster, which can be done from one of the other NSX-T managers.
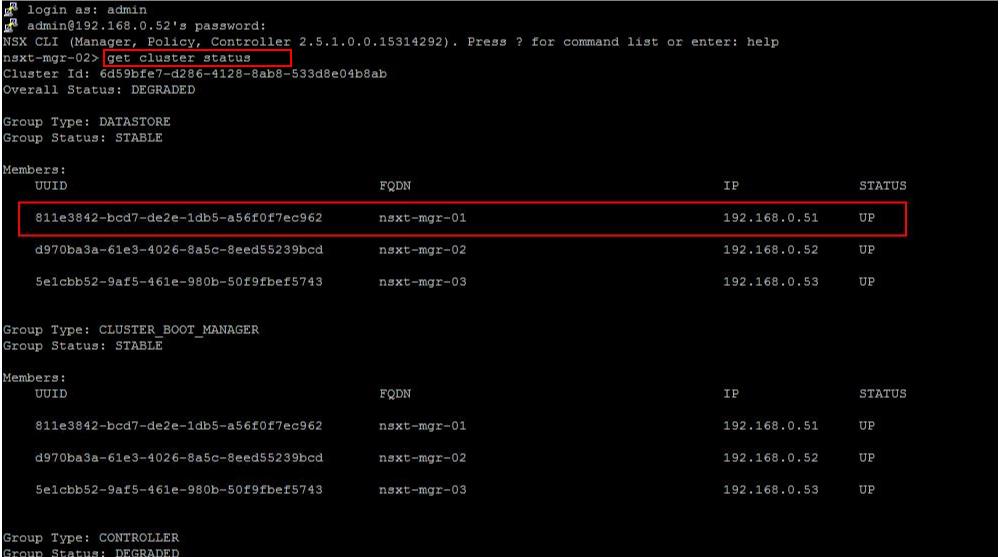
Login to other NSX-T Manager via SSH using “admin” credentials. Type the below command to get the NSX-T cluster status
get cluster status
The cluster status command shows the cluster members and status of each of the NSX-T manager node along with the status of each of the cluster service group status.
The NSX-T Manager which we want to be removed is associated with the IP “192.168.0.51”. Note down the UUID of the NSX-T Manager node.
To detach the NSX-T Manager node, run the below command
detach node <NSX-T Manager UUID>
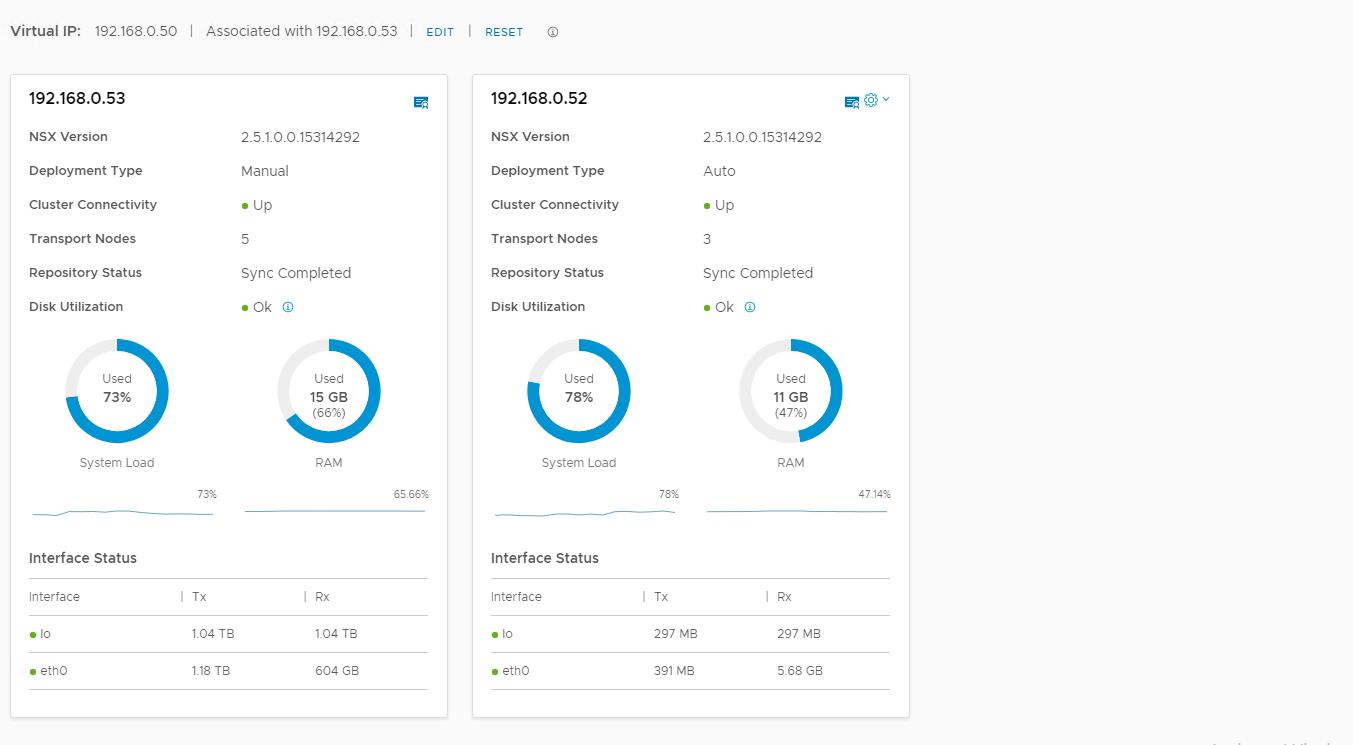
Detach command will show the output as “Node has been detached”. We can see the same in the NSX-T Manager UI now. My NSX-T Manager “192.168.0.51” is detached from the NSX-T Manager cluster.
Detach node command will only detach and remove NSX-T Manager from the NSX-T Manager cluster but it will not delete or power off the NSX-T Manager virtual machine from the vCenter Server inventory.
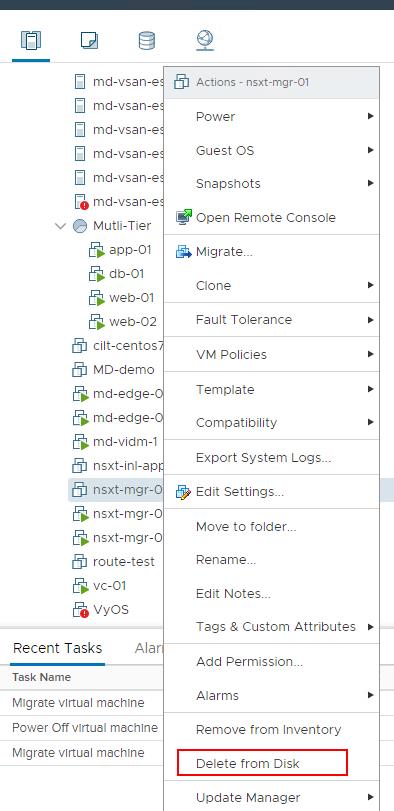
I can still see the NSX-T Manager “nsxt-mgr-01” is still Up and running.
We need to power off the NSX-T Manager VM and delete the VM from disk. So we can re-deploy the NSX-T Manager from the NSX-T Manager UI.
I hope this article will help you with the detailed procedure to remove NSX-T Manager from NSX-T Manager Cluster. This will be handy especially when you are troubleshooting the NSX-T Manager issues.
You can simply detach the problematic NSX-T manager node and re-deploy the new NSX-T Manager. I hope this is informative for you. Thanks for Reading!!!. Be social and share it with social media, if you feel worth sharing it.


