Ruby vSphere Console (RVC) is one of the primary tools to manage and troubleshoot vSAN environment. The Ruby vSphere Console is a console user interface for VMware ESXi and Virtual Center. The Ruby vSphere Console comes bundled with both the vCenter Server Appliance (VCSA) and the Windows version of vCenter Server. RVC is a programmable interface that allows administrators to query the status of vCenter Server, clusters, hosts, storage, and networking. For vSAN, there are quite a number of programmable extensions to display a considerable amount of information to manage and troubleshoot vSAN cluster using RVC. I have already written a post about Manage and troubleshoot VSAN cluster using RVC command. Since Disks are the core build blocks of VSAN cluster, I will explain you with few more commands to monitor VSAN disks using RVC commands.
Monitor VSAN Disks using RVC Commands
There are many RVC commands to monitor and troubleshoot VSAN cluster and VSAN disk. I will list out some of the important commands to Monitor VSAN disks using RVC commands.
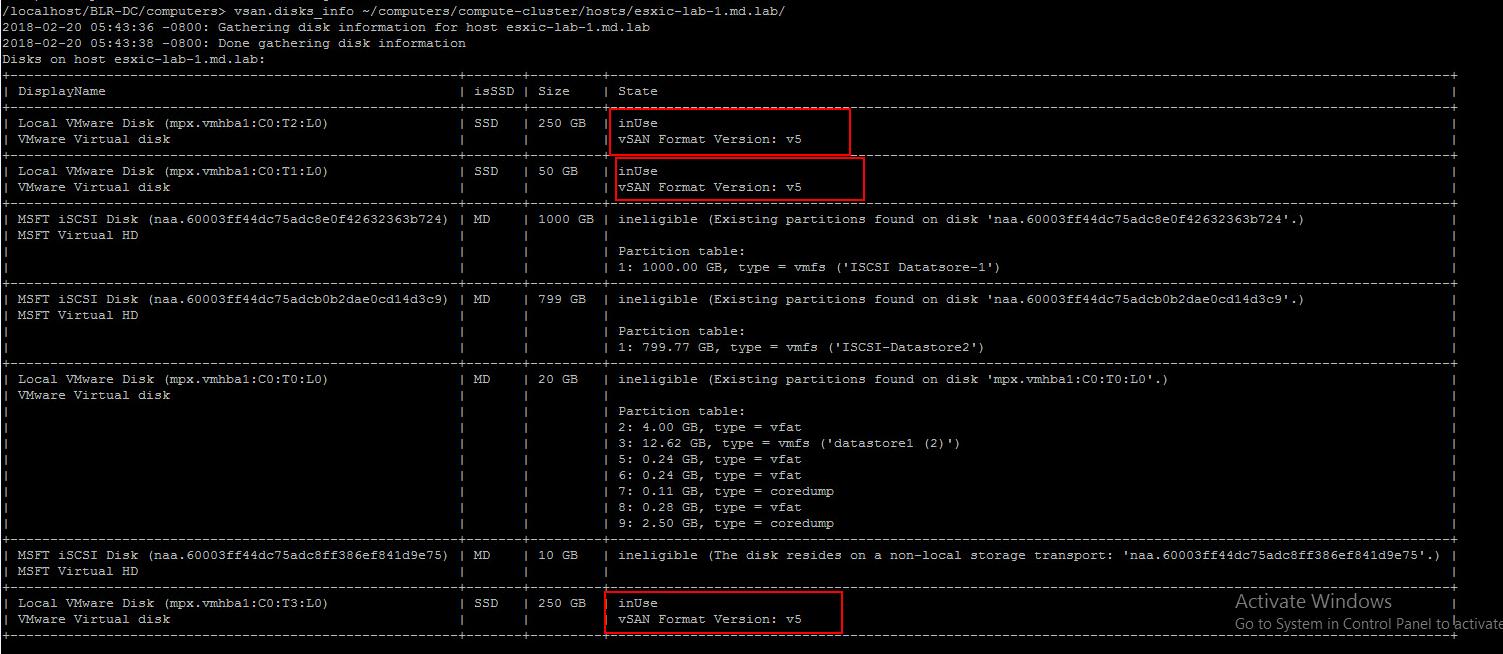
vsan.disks_info
This command displays information about every disk on the ESXi host, both magnetic disks (MD) and solid state disks (SSD). You can also able to identify the disks which are in use by VSAN disk group. It shows “inUse” and also “vSAN Format version”
vsan.disks_info ~/computers/clustername/hosts/hostname/
It displays the disk display name, type of the disk either SSD or MD (Magnetic disk), Size of the disk and State of the disk (used By VSAN, ineligible for VSAN along with Partition information)
vsan.disks_stats
This command displays information about the disks in a host or cluster, including whether or not it is a magnetic disk or solid state drive, how many components reside on the disk, disk capacity, how much is used, if any of it is reserved via the ObjectSpaceReservation policy setting, if it’s health is OK and what is the version of
the on-disk format.
vsan.disks_stats ~/computers/clustername/
As I mentioned, you can run this command against host and cluster. when this command is run against a host, all other disks on the remaining hosts in the cluster appear as N/A in the DisplayName and Host columns.
vsan.disk_object_info
This command displays all of the components that reside on a physical disk. This command takes two arguments. The first argument corresponds to either a
host or cluster. The second argument is the disk_uuid. This is the same as the NAA id. NAA id can be found from the displayName section of the vsan.disks_info which we have discussed above.
vsan.disk_object_info ~/computers/clustername/ disk_uuid
Each object displayed begins with DOM Object. Policy information is displayed for the object, including forceProvisioning, hostFailuresToTolerate, proportional capacity, StripeWidth, and cacheReservation.
The next piece of information is the list of components that go to make up the object. Even when other components that make up the object reside on different hosts and disk, all component are displayed. The components that are made with ** refer to components that are on this particular disk that was queried.
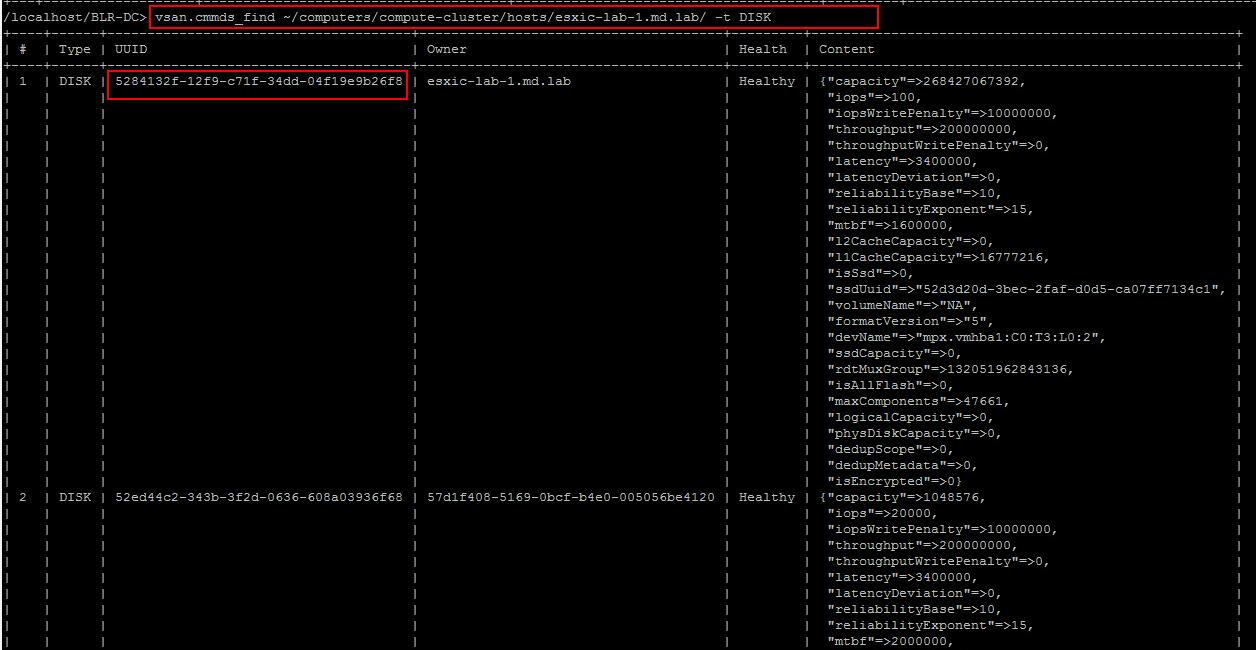
vsan.cmmds_find
This command displays additional information about an object or component on Virtual SAN when only the UUID is known. It provides low-level access to the “cmmds-tool find” from RVC
vsan.cmmds_find {cluster|host} {, -t, --type} {-u, uuid} {-o, --owner} {-h, --help}
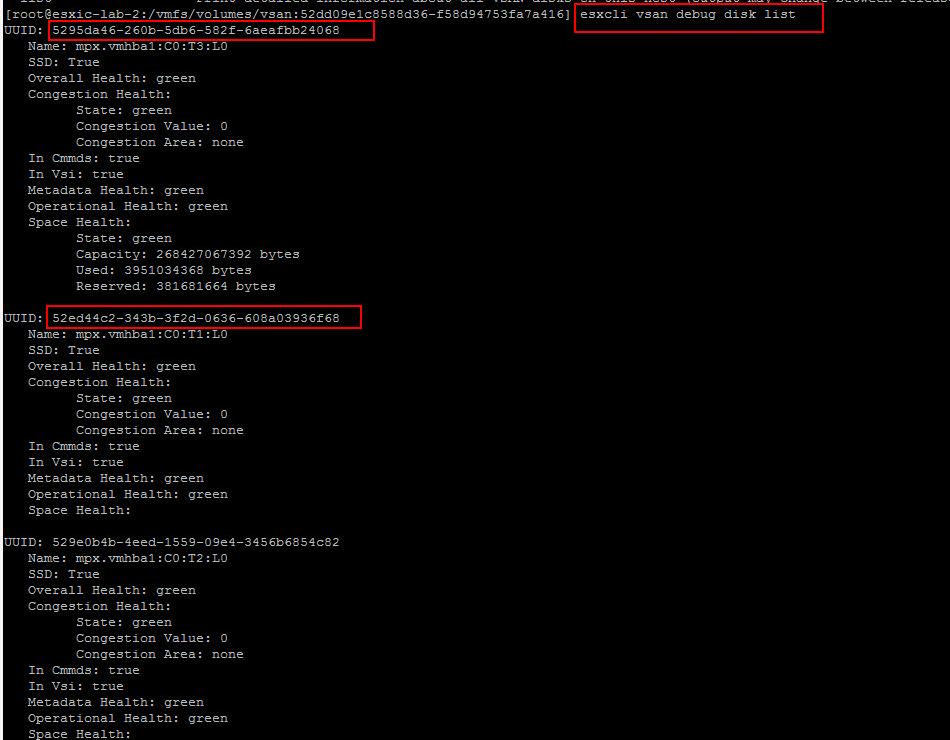
esxcli vsan debug disk list
In addition to the above RVC commands, I would like to include one of the esxcli vsan command which is useful to get the disk information from ESXi host without login to vCenter server appliance
esxcli vsan debug disk list
It allows you to list the VSAN disks and summary of physical disks of the ESXi hosts participated in VSAN cluster.
That’s it. I believe this is informative for you. Thanks for Reading!!!. Be social and share it with social media, if you feel worth sharing it.


