Altaro VM Backup is ease of use and affordable backup solution to protect your VMware and Hyper-v environment. Altaro VM backup provides a hassle-free backup solution without the need for any complex configuration or other software dependencies. As we discussed already, Configuring Altaro VM backup to backup VMware virtual machines are equivalently simple as the installation of Altaro VM Backup for VMware. Once the installation is completed, We need to configure Altaro VM Backup for VMware. Configuration is just a simple 2 step process. First one is to add the Hypervisors such as VMware ESXi host or VMware vCenter Server to back up the virtual machines running on the VMware virtual infrastructure. Followed by configuring the storage location for VMware VM Backups.
Altaro VM Backup for VMware supports almost all versions of ESXi and vCenter server starting from vSphere 5.0 till vSphere 6.7 latest in the market. Altaro backup support to the latest vSphere version (vSphere 6.7) makes the virtual machine backups more flexible for the customers who want to upgrade their virtual infrastructure to the latest vSphere version. Customers don’t need to wait for the vSphere upgrade until the backup software compatibility with the latest vSphere versions. In this article, I will explain the detailed step by step procedure to configure Altaro VM backup for VMware to start protecting your vSphere virtual machines.
Configure Altaro VM Backup for VMware Virtual Infrastructure
Add VMware Host to Altaro VM Backup Management Console
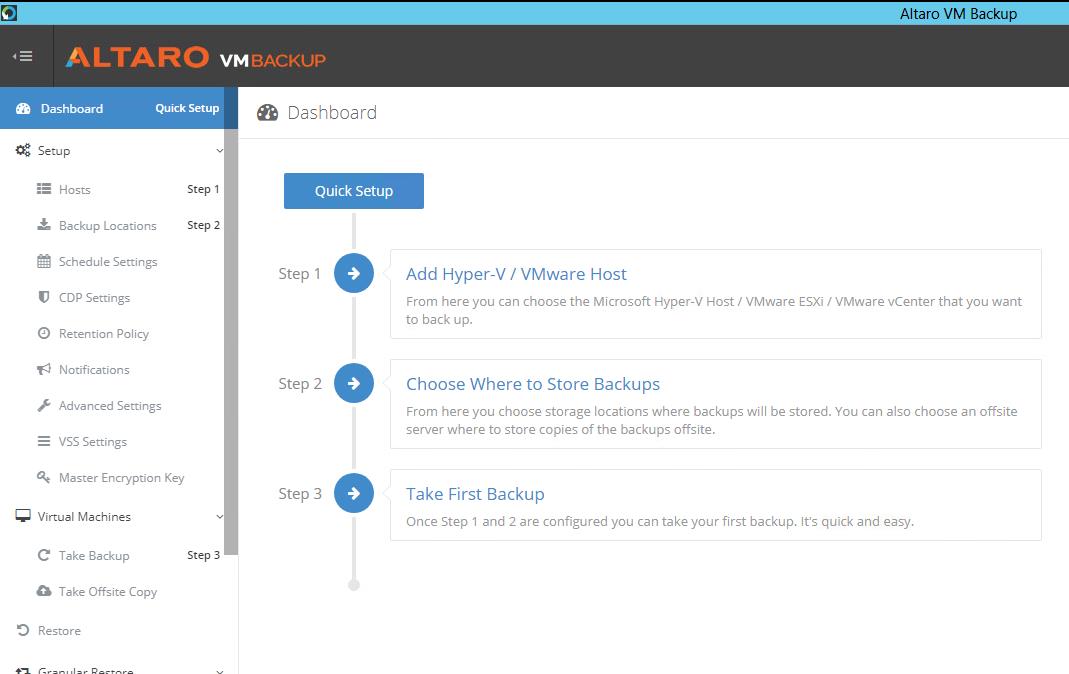
The first step in configuring Altaro VM Backup for VMware virtual infrastructure is to add the VMware Host either VMware ESXi or VMware vCenter Server as the backup inventory to back up the virtual machines running on the VMware infrastructure. To add the VMware Host or vCenter Server, Login to the Altaro VM Backup management console. You will be provided with quick setup information when you log in to the Altaro VM backup management console.
Click on “Add Hyper-V/VMware Host” to select the hypervisors whose VMs you want to backup.
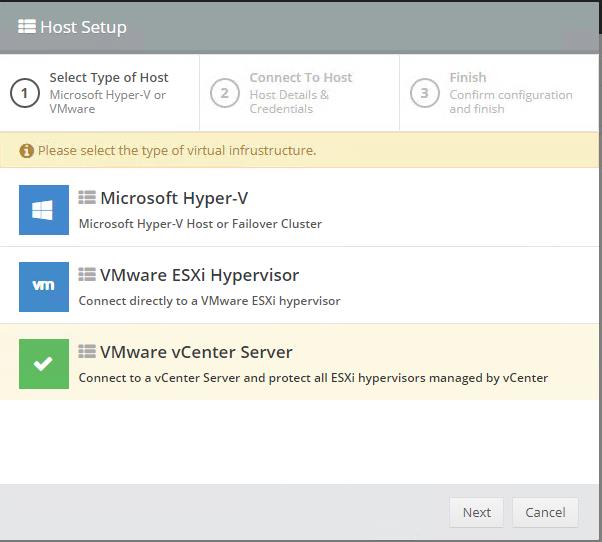
I have my virtual environment running with the latest vSphere version i.e vSphere 6.7 and also I have vCenter Server 6.7 managing all my ESXi and VMware virtual machines. Click on VMware vCenter Server and click Next.
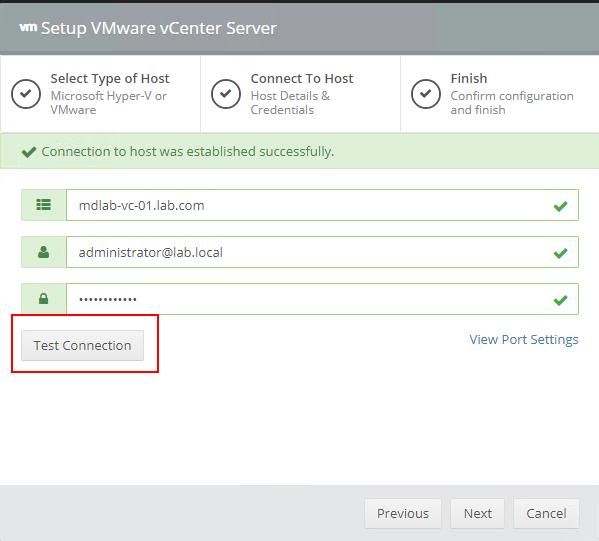
Specify the vCenter Server fully qualified name or IP address, Username and password to connect to the VMware vCenter Server. Click on “Test Connection” to test the vCenter server connection. Click Next to proceed further.
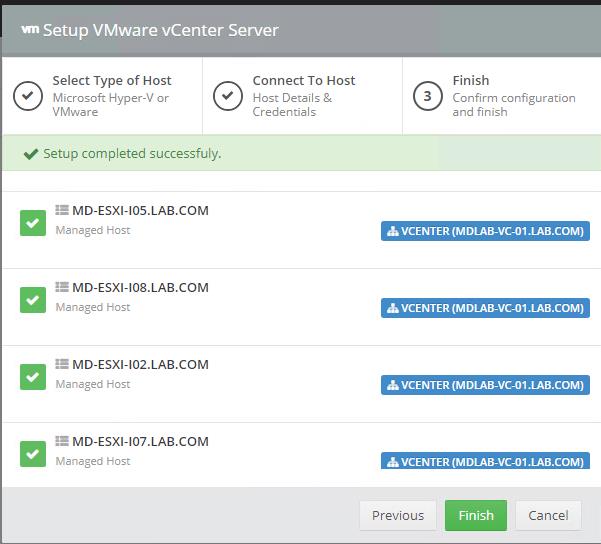
Once the connection is established between the Altaro VM Backup management console and VMware vCenter server, It will display the vCenter inventory such as ESXi hosts which are managed by the connected vCenter Server. Click Finish to proceed further.
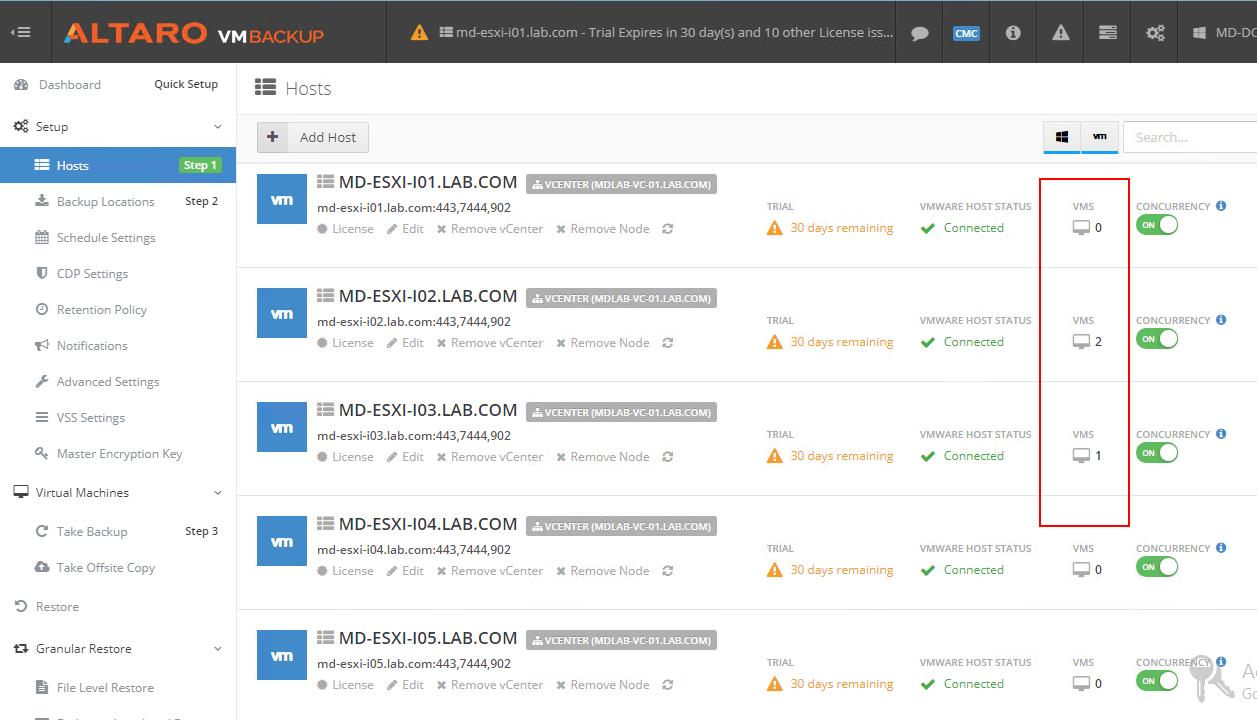
Once the vCenter is added, It will display the vCenter server managed ESXi hosts and virtual machines running on each of the ESXi hosts. It also displays the VMware Host stats whether it is connected or disconnected. It also displays the Altaro VM backup license assigned to each of the objects.
Add Backup Location for Altaro VM Backup
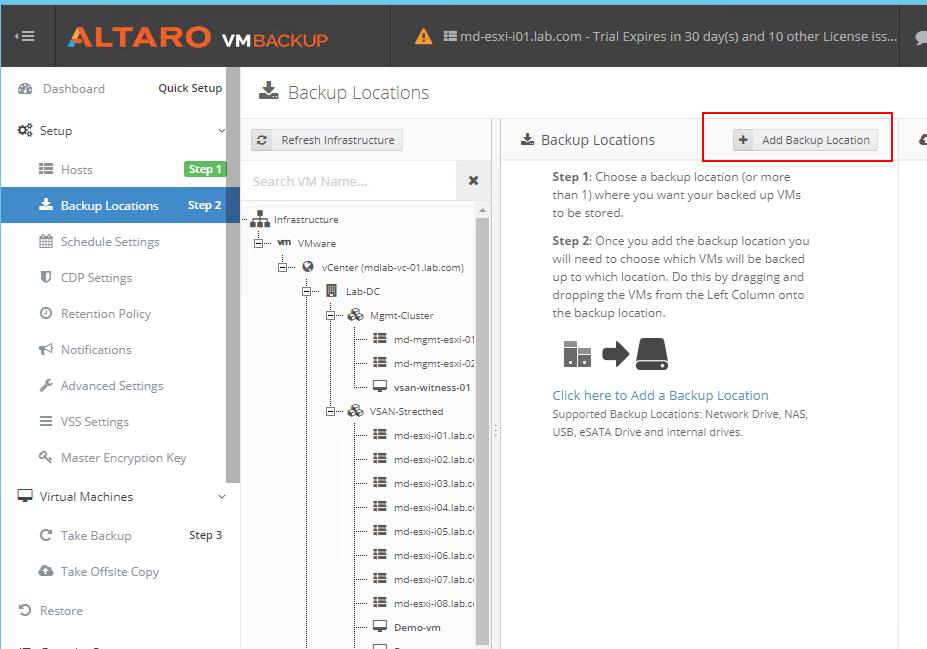
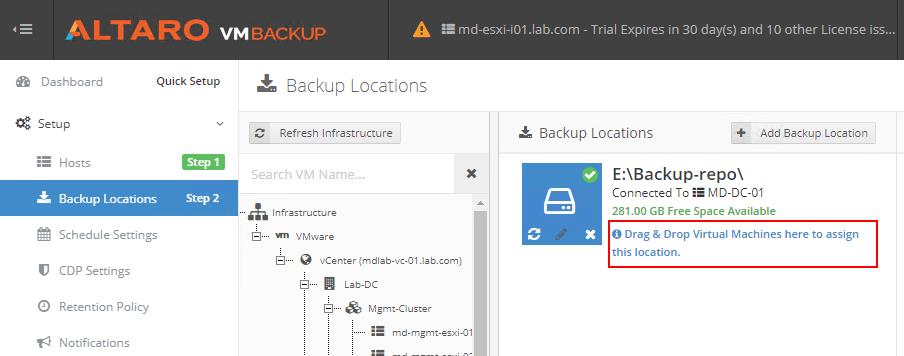
The second step in configuring Altaro VM Backup is to adding the backup location. The backup location is nothing but the location where you want your backed up virtual machines to be stored. In the management console, Click on Backup Locations -> Add Backup Location
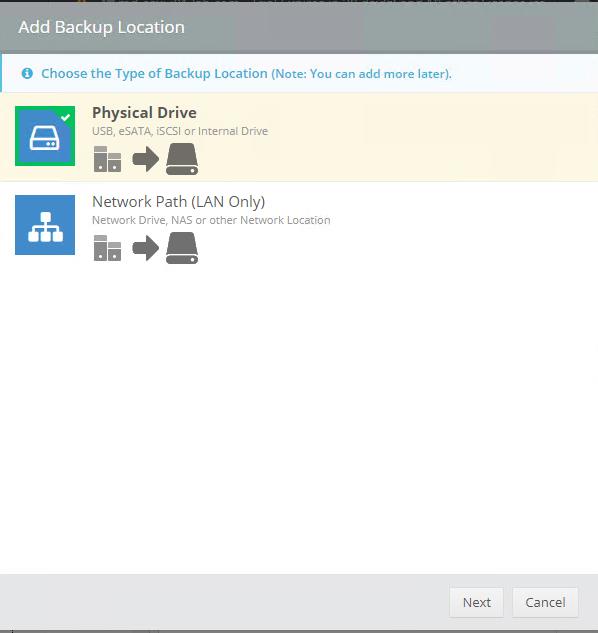
Altaro VM Backup supports two types of backup locations. physical drive (USB,eSATA,iSCSI or Internal drive) or Network Path (Network drive, NAS or other network location). Select the backup location and click Next.
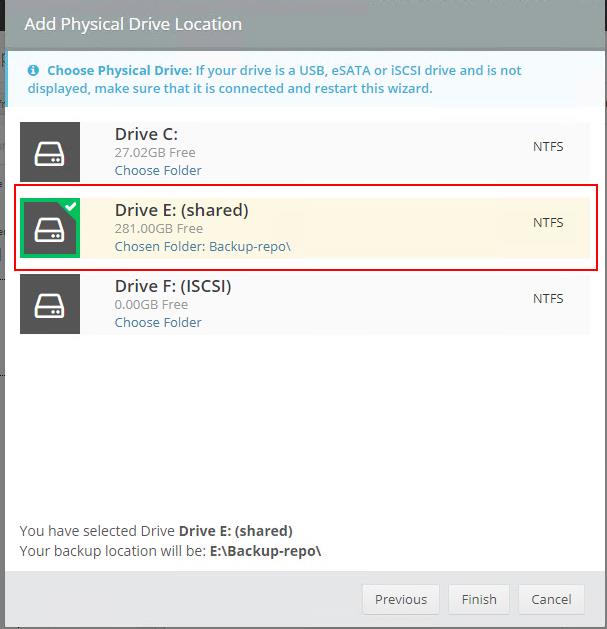
Since I have selected physical drive as my backup location, you need to specify the drive location in the windows machine. You can also select the folder to store the virtual machines backup on that particular drive. Click Finish to complete the configuration of backup location.
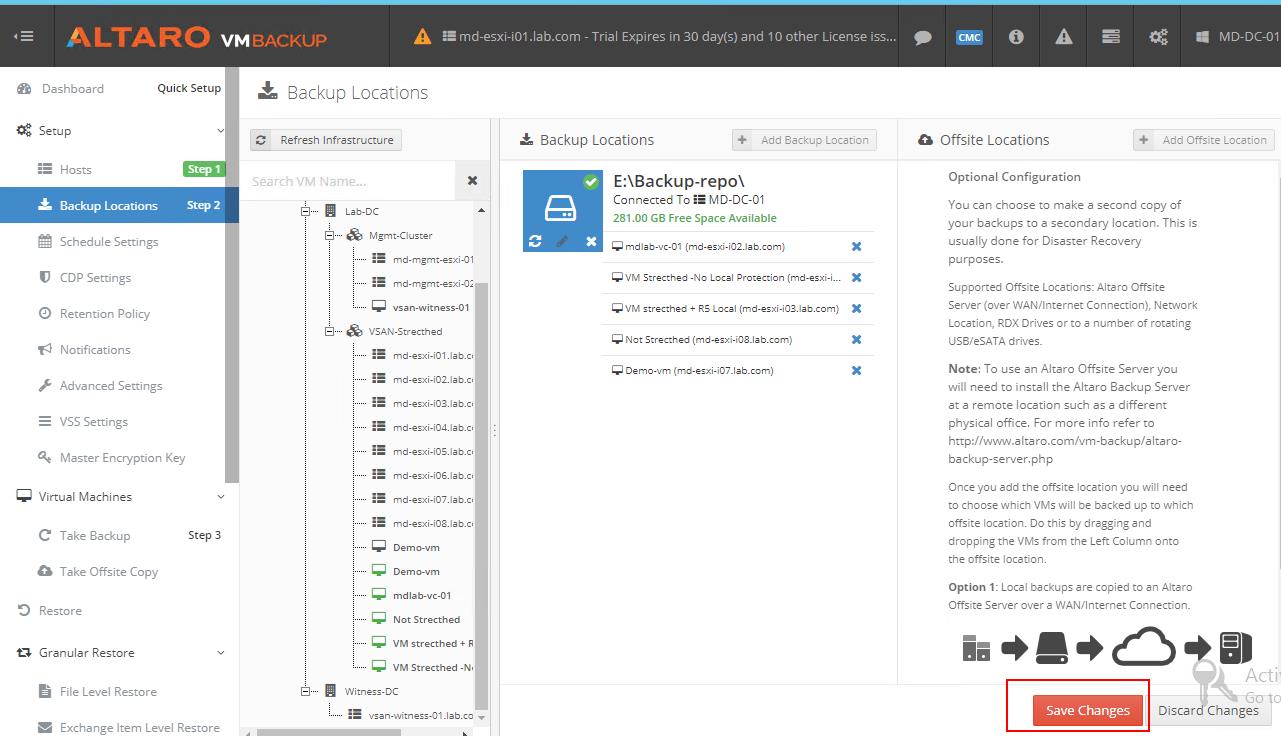
We can add multiple backup locations to store the virtual machine backups. We also have the option to specify the backup location for each virtual machine to store its backup, having one primary backup location and one offsite copy location setup per VM.
Once the Altaro VMBackup backup location is configured, Drag and drop the virtual machines under the backup location from the left side. Click Save Changes.
That’s it. We are done with the two-step process to configure Altaro VM Backup for VMware. We are now ready to kick in the first backup of the virtual machine using Altaro VM Backup for VMware. I hope this article will be informative for you. Thanks for reading!!!. Be social and share it with social media, if you feel worth sharing it.


