This simple post is going to explain you the procedure to mount your VMware VMDK virtual disk as windows drive. This may be needed incase if you want to access your VMware Virtual Machine files from your windows machine or to transfer some files from windows machine to your virtual machine or vice versa. To achieve this , you must have one of VMware products like VMware Workstation or Player installed on your windows machine. Let’s jump in to the procedure to mount your VMware VMDK virtual disk in your windows machine. Usually, VMware Virtual disks are in .VMDK file format. It will be located on the same directory, where you virtual machines files are stored. There are 2 different ways to mount your VMDK virtual disk into windows machine. Let’s discuss both methods in this post.
Method 1:
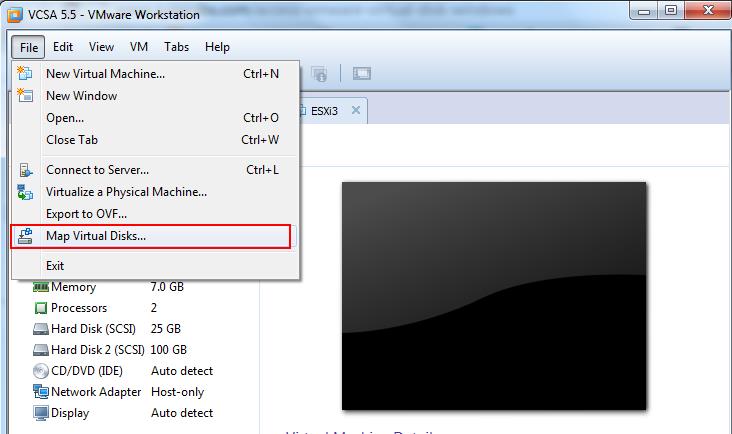
Open your VMware Workstation, and Click on File and Select Map Virtual Disks
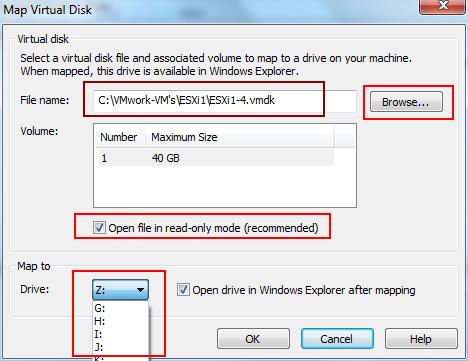
Click on Browse and browse towards the location of your VMDK virtual disk file and verify the volume size. It is always recommended to open the file in read-only mode to avoid unnecessary data loss or drive corruption. Select the Drive Letter from the drop down by your choice and click on OK. That;s it your VMDK will be mounted on your Windows Machine with the drive letter specified.

Method 2
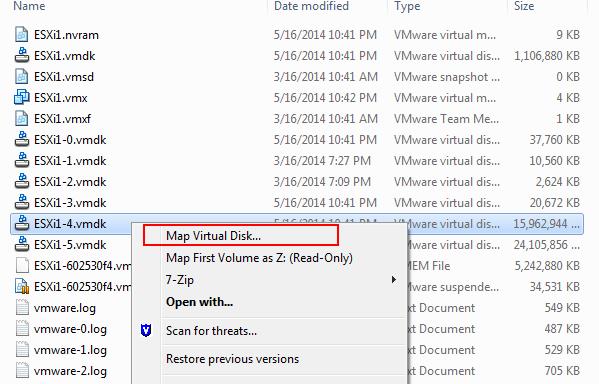
You can browse directly the location VMDK files and right-click on the VMDk file which you want to mount in windows machine and select Map Virtual Disk and Select the VMDK to mount.
I hope this is informative for you. Thanks for Reading !!!. Be Social and Share it in Social Media, if you feel worth sharing it.


