VMware SRM recovery plan to handle a planned migration or other can be created only to recovery specific application or services by only including specific protection groups as part of the recovery plan. Recovery plans can be used for Test recovery, planned migration to the recovery site or for disaster recovery.In my previous article, I have explained the step-by-step procedure to create vSphere Replication based Recovery Plan in VMware SRM. In this article, I will explain the detailed procedure to validate the recovery plan by running Test recovery of vSphere Replication based recovery plan.
SRM Test recovery is nothing but a testing a recovery plan exercises with every aspect of the recovery plan. Site recovery manager ensures that test recovery will avoid disruption in ongoing operations of the protected and recovery site.
You can run SRM test recovery at any time.Running SRM test recovery does not disrupt replication or ongoing activities at either site. It is always recommended to run recovery plan test as often as needed to ensure that your actual DR plan is working as expected.
Perform Test Recovery of vSphere Replication based Recovery Plan
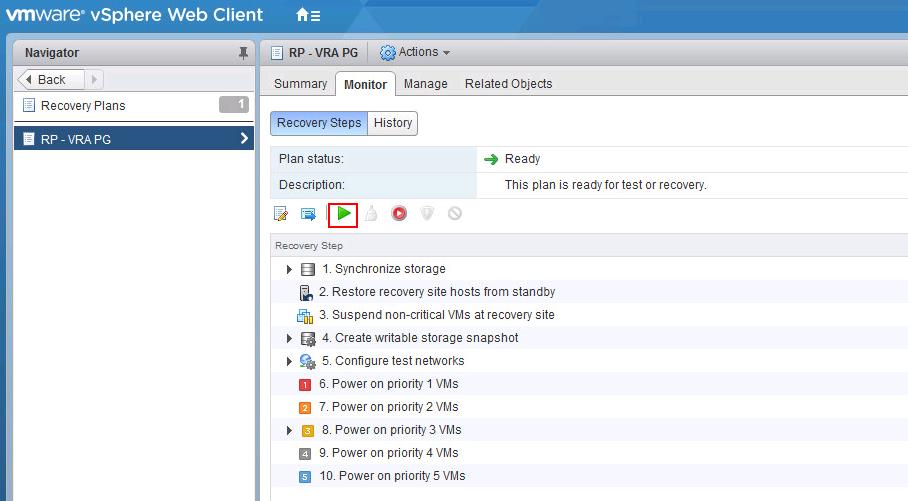
You can run the test recovery of vSphere Replication based recovery plan once all the SRM configuration is done. To run test recovery, Login to vCenter Server using vSphere Web client -> Site Recovery Manager -> Sites-> Recovery Plans -> Select the recovery plan -> Monitor -> Recovery Steps -> Press Green Play button to start the test recovery of vSphere Replication based recovery plan.
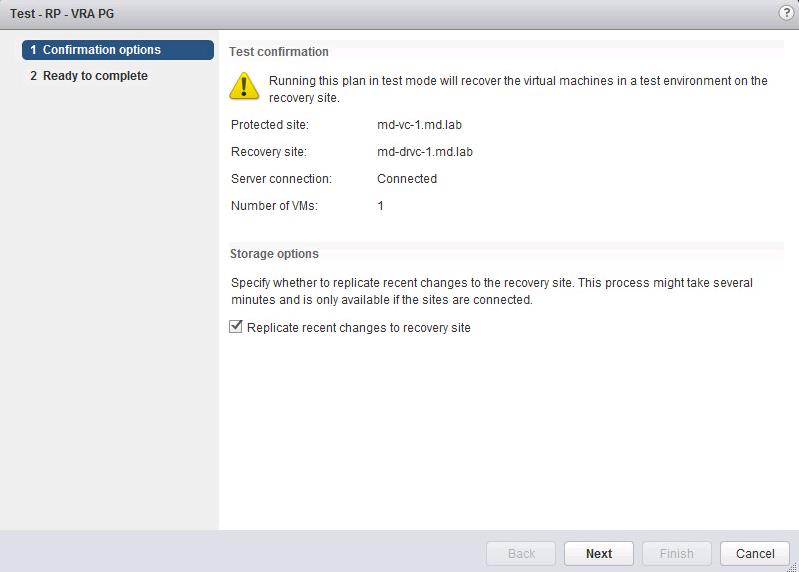
Once you have clicked on the Green Arrow button to start the SRM test recovery, recovery will run in test mode and it will recover the virtual machines in a test environment on the recovery site.
You have storage option whether to replicate recent changes to the recovery site or not. This process may take several minutes to complete the replication of recent changes to the recovery site using vSphere Replication.
It is up to you run the test recovery with recent changes or not. I have selected the option to replicate recent changes to the recovery site. Click on Next.
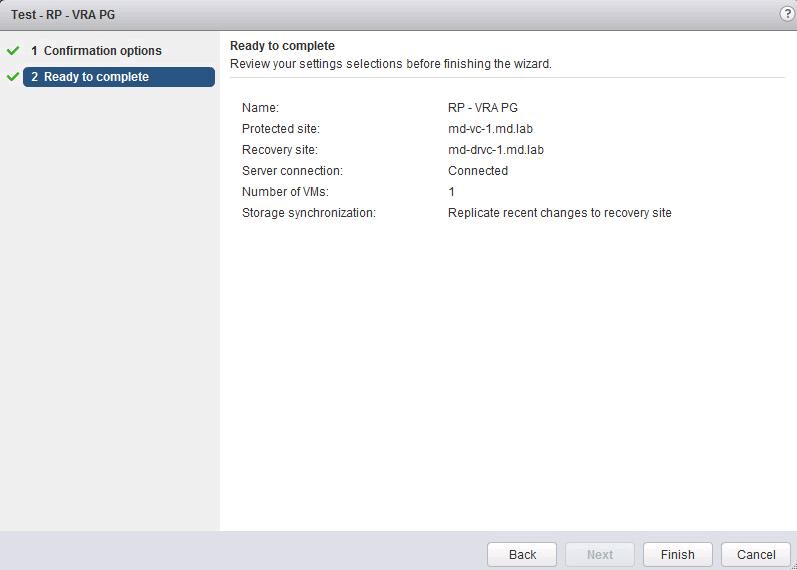
Review your settings selections before initiating the SRM Test Recovery and click on Finish.
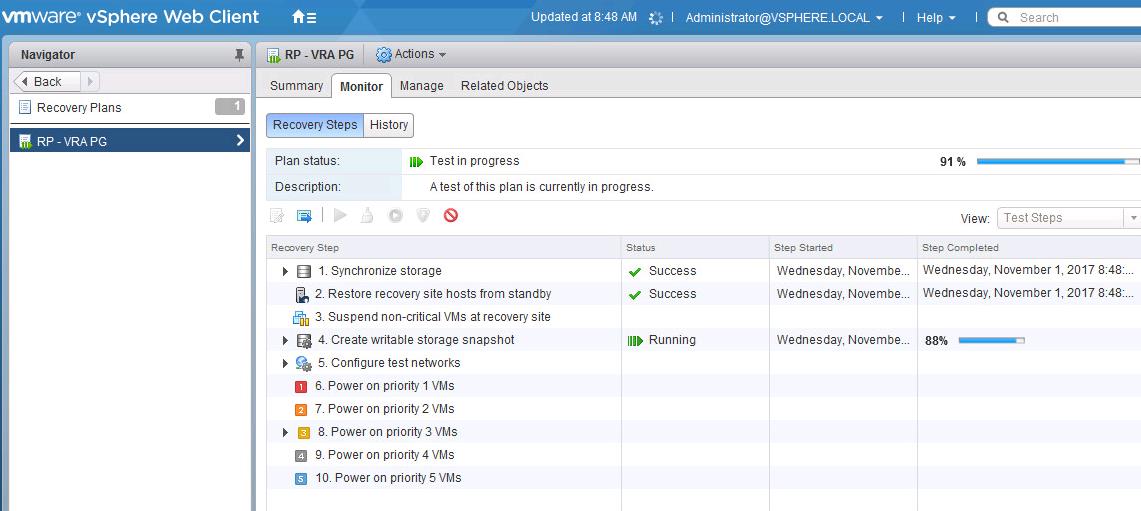
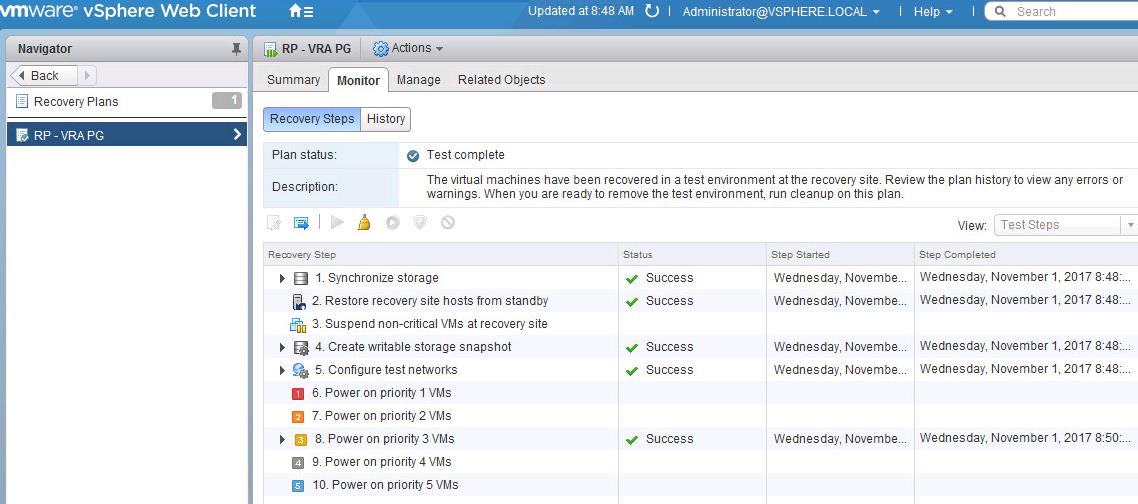
Once SRM test recovery is executed, you will be able to see the series of test steps involved as part of this recovery plans and its progress percentage. Since I have selected the option to “Replicate recent changes to recovery site”, I can see that Synchronize Storage is completed and followed by other steps.
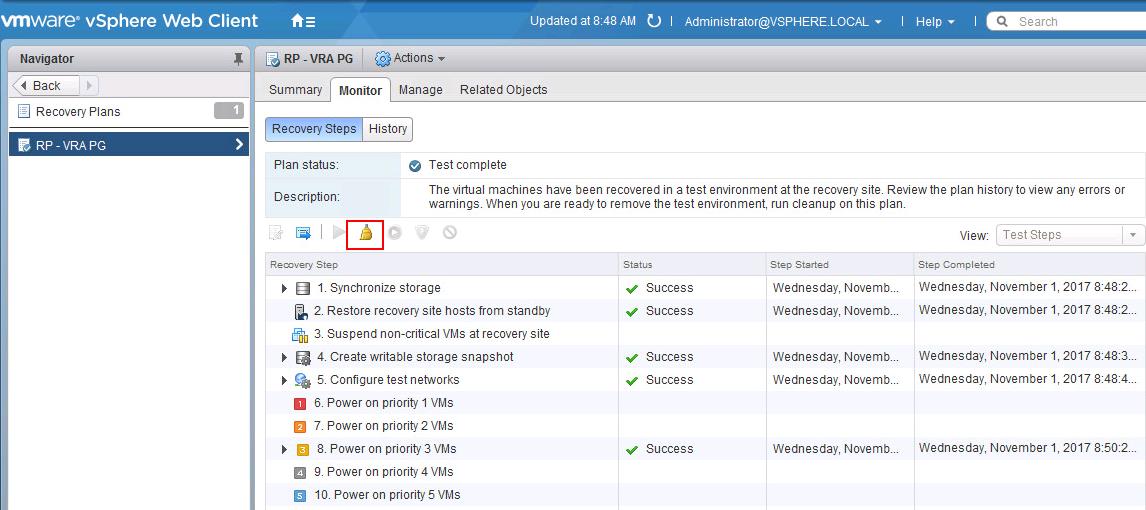
Once test recovery is completed, You can see the Plan status will display “Test Complete”. and status of each recovery steps will be Success.
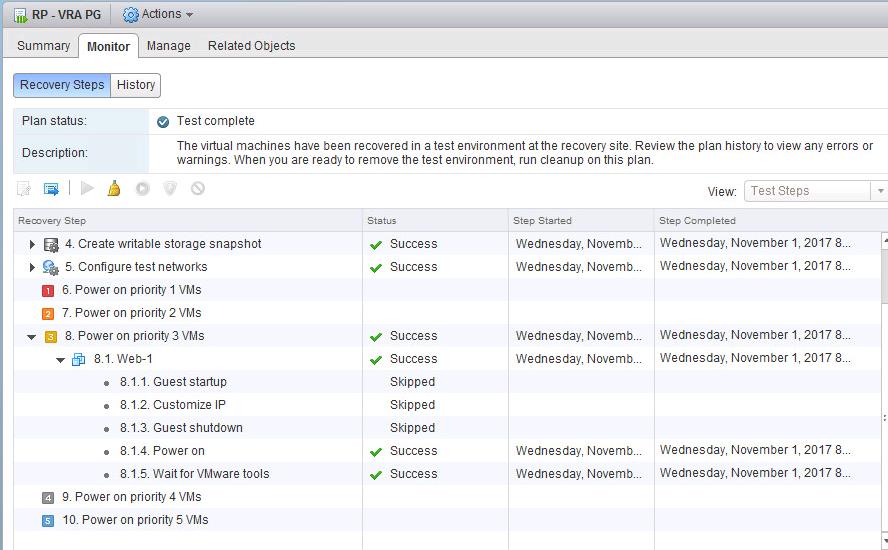
Each recovery steps in recovery plan will have substeps involved. For example, When i expand the Power on VMs will have around sub-steps including Configure Test network, Guest startup, Customize IP if you have added, Guest shutdown, Power on and Wait for VMware tools. All these steps in test recovery don’t cause any distribution to actual virtual machines.
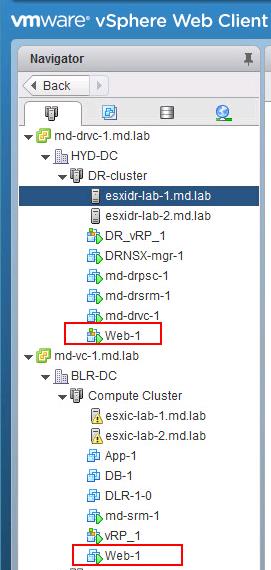
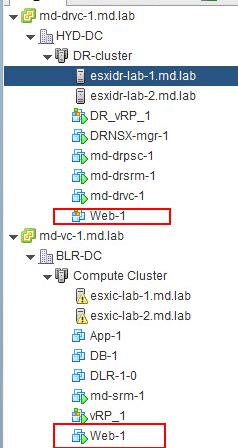
Once the test recovery is completed, I can see the virtual machine “Web-1” which is part of the protection group as part of this recovery plan is powered on in both protected and recovery site without interruption to your production virtual machines.
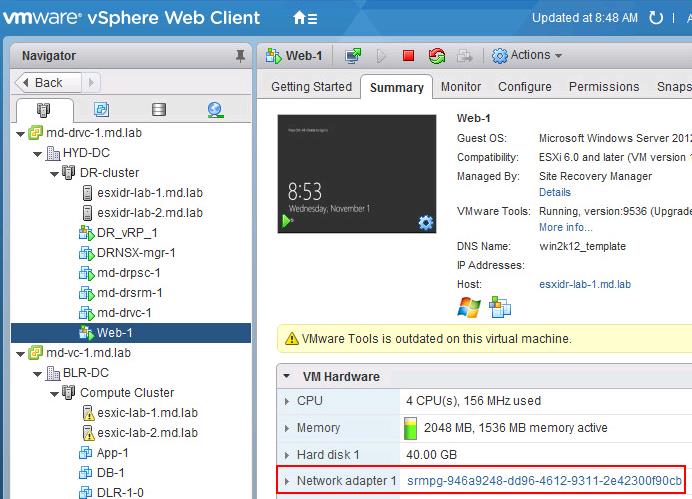
You can notice the port group connected to the virtual machine. It is named as “srmpg-xxxxxxxxxx”. It is nothing but automatic test network created by SRM in each of the ESXi hosts to connect to the virtual machines during test recovery. Default test network is an isolated port group. Virtual machines can communicate to other VM’s in the same ESXi host but not across the VM’s in other ESXi hosts.
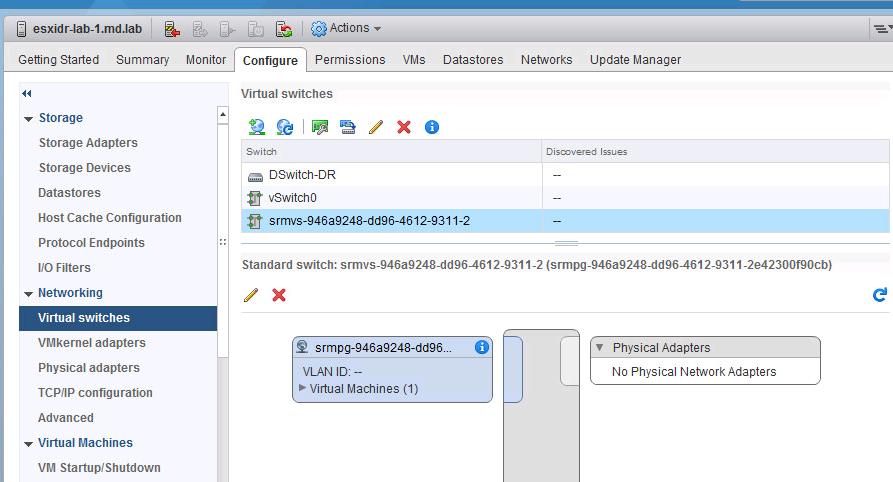
When I look at the ESXi networking, I can see an isolated virtual switch with the port group without any uplink is created by SRM during the test recovery and all the virtual machines configured with default test network will be connected to this isolated bubble network during test recovery.
Once the test recovery is completed you can clean up the test recovery of the recovery plan. Click on Brush symbol to start the cleanup.
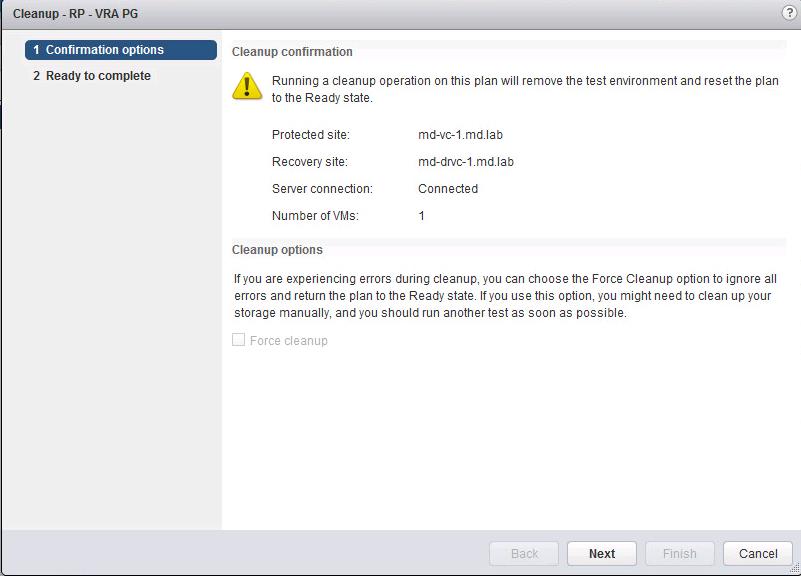
Click on Ok to start the cleanup of the test recovery of vSphere based recovery plan.
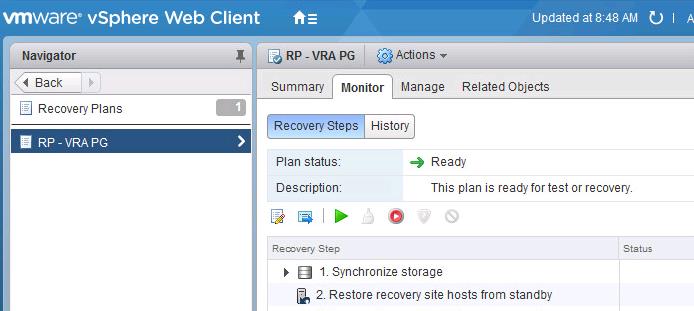
Once the cleanup is completed, your recovery plan will now have Green and Red play enabled and you will be ready to run one more test recovery or even planned or unplanned recovery.
After the cleanup is completed, We can notice that the virtual machine “web-1” is powered off in recovery site and replaced it with placeholder VM in the recovery site.
That’s it. We are done with running the test recovery of vSphere replication based recovery plan and ensured that our DR recovery plan is working as expected. I hope this is informative for you and Thanks for Reading!!!. Be social and share it on social media, if you feel worth sharing it.
Disaster Recovery :
VMware Site Recovery Manager (SRM 6.0) Part 1- Overview and Architecture
VMware Site Recovery Manager (SRM 6.0) Part 2 – VMware SRM 6.0 installation
VMware Site Recovery Manager (SRM 6.0) Part 3 – Configuring SRM Site Pairing
VMware Site Recovery Manager (SRM 6.0) Part 4 – Installing Storage Replication Adapters (SRAs)
VMware Site Recovery Manager (SRM 6.0) Part 5 – Configuring SRM Array Manager
VMware Site Recovery Manager (SRM 6.0) Part 6 – Creating SRM Resource Mappings
VMware Site Recovery Manager (SRM 6.0) Part 7 – Configuring SRM Folder Mapping
VMware Site Recovery Manager (SRM 6.0) Part 8 – Configuring SRM Network Mapping
VMware Site Recovery Manager (SRM 6.0) Part 9 – Configuring SRM Placeholder Datastores
VMware Site Recovery Manager (SRM 6.0) Part 10 – Creating SRM Protection Group
VMware Site Recovery Manager (SRM 6.0) Part 11 – Creating SRM Recovery Plans
VMware Site Recovery Manager (SRM 6.0) Part 13 – Cleaning up Test Recovery
SAN Replication :
VMware SRM 6.0 Array Based Replication Part 1 – Deploying HP Store Virtual VSA
VMware SRM 6.0 Array Based Replication Part 3 – Configuring HP StoreVirtual VSA Management Group
VMware SRM 6.0 Array Based Replication Part 5 – Configuring HP StoreVirtual VSA Replication


