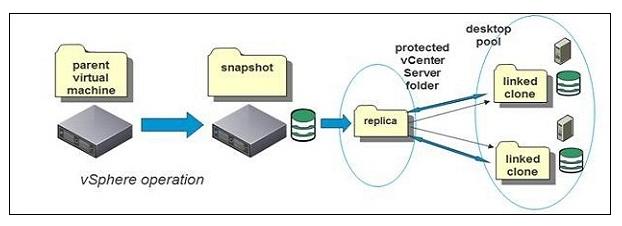
In the Previous Post, We have discussed about types of Desktop pools and how to create Manual desktop pool. This post will help you to understand linked clones and how to create linked clones. A linked clone is a copy of a virtual machine that shares virtual disks with the parent virtual machine in an ongoing manner. This conserves disk space, and allows multiple virtual machines to use the same software installation.
A linked clone is made from a snapshot of the parent. All files available on the parent at the moment of the snapshot continue to remain available to the linked clone. Ongoing changes to the virtual disk of the parent do not affect the linked clone, and changes to the disk of the linked clone do not affect the parent. A linked clone must have access to the parent. Without access to the parent, a linked clone is disabled.
Preparing Template for Deploying Linked Clones Desktop
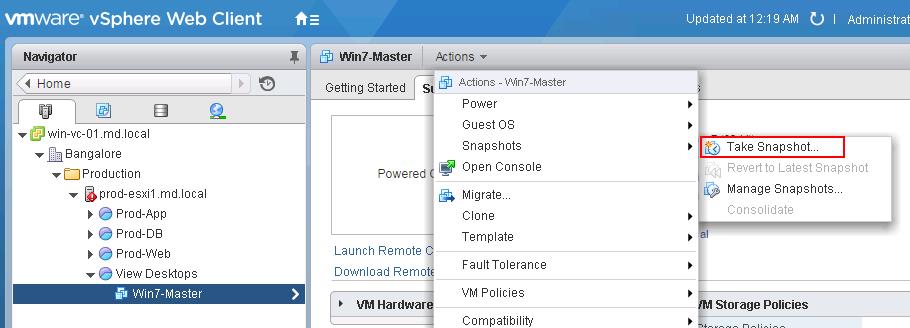
Before preparing the linked clone desktop, you must have installed View Composer in your infrastructure. From vSphere Web Client, deploy a new virtual machine which will be acting as parent virtual machine for desktop deployment. Install the necessary software’s and Install View agent software on the Virtual machine and Power off the VM. Right-click the Virtual Machine and Take a snapshot, once you are done with the installation of alll necessary software’s.
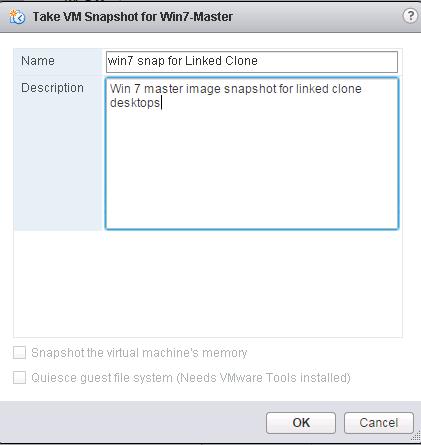
Provide the the name and description for the Snapshot created for the linked clone desktops.
Deploying Linked Clone Desktop Pools
Log in to View Connection server admin portal. Expand Catalog and select Desktop Pools. Click Add to desktop pools.
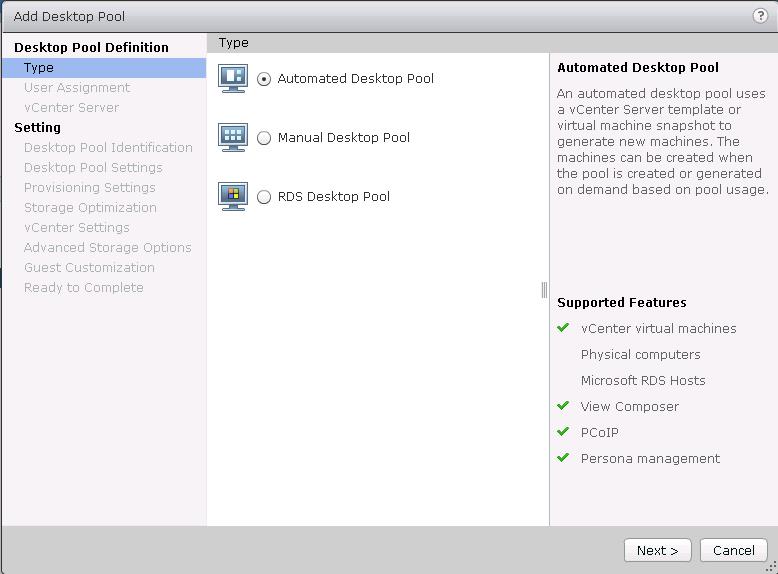
Select Automated Desktop Pool and click Next. You must always choose Automated Desktop Pool for linked clone deployments. Click on Next.
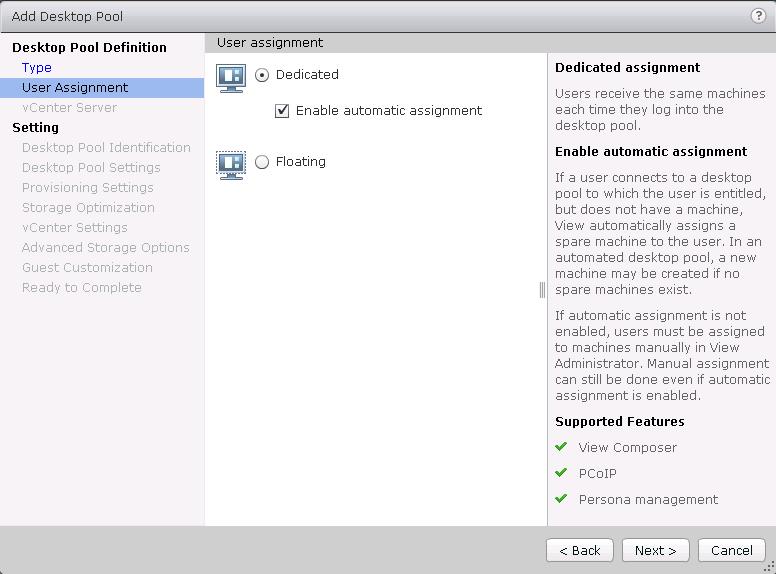
Choose Dedicated user assignment and click Next. Select the checkbox “Enable automatic assignment”.
Dedicated Assignment
Each user is assigned a particular remote desktop and returns to the same desktop at each login. Users can personalize their desktops, install applications, and store data.
Enable Automatic Assignment
If automatic assignment is not enabled, users must be assigned to machines manually in View Administrator. Manual assignment can still be done even if automatic assignment is enabled
Floating Assignment
Using floating-assignment pools also allows you to create a pool of desktops that can be used by shifts of users. For example, a pool of 100 desktops could be used by 300 users if they worked in shifts of 100 users at a time. The remote desktop is optionally deleted and re-created after each use, offering a highly controlled environment. A floating-assignment desktop is like a computer lab or kiosk environment where each desktop is loaded with the necessary applications and all desktops have access to necessary data.
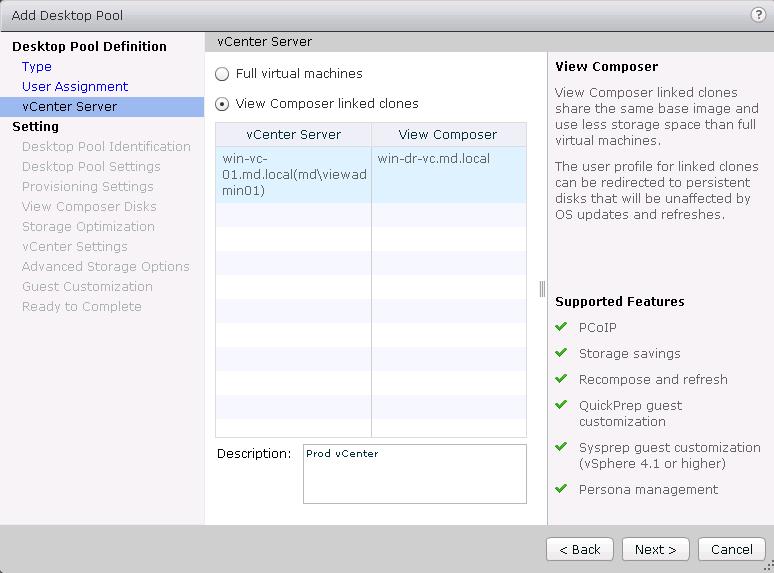
Choose “View Composer Linked Clones” and click on Next. Ensure your vCenter server and View composer is selected.
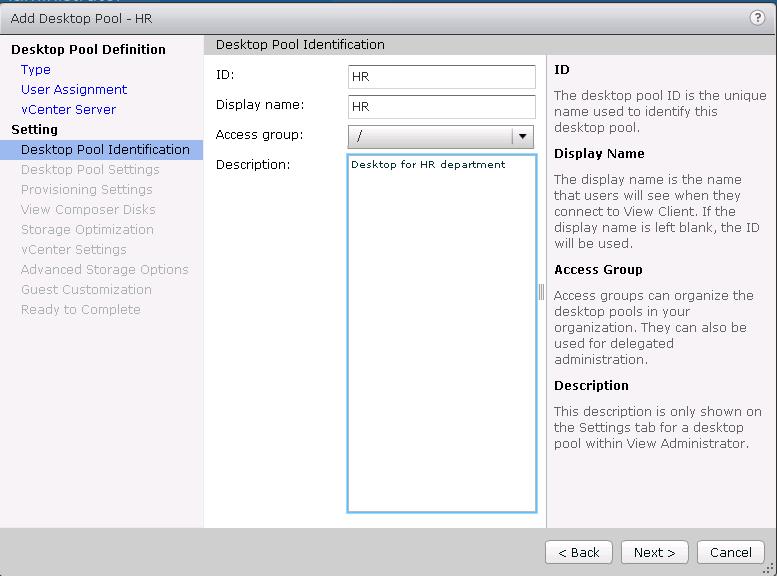
Type the Desktop Pool identification like ID, Display name, Access group and Description. Click on Next.
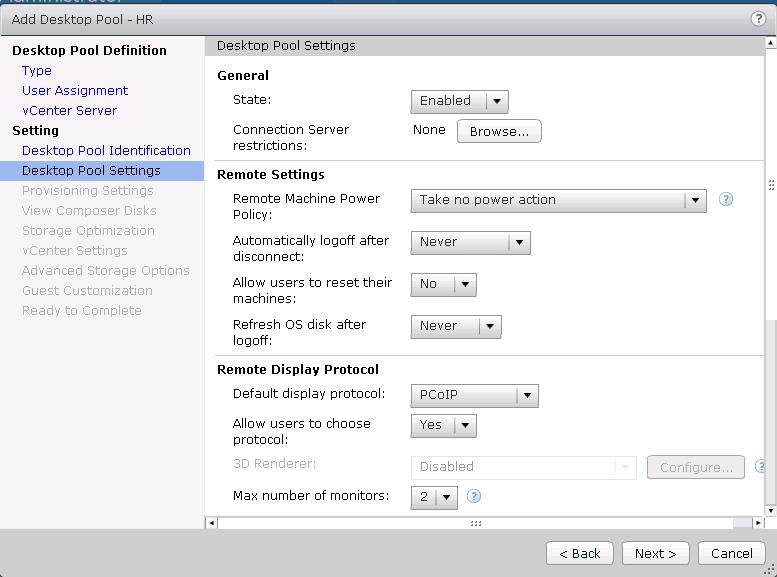
Configure the Desktop pool settings which matches your organization needs and click on Next.
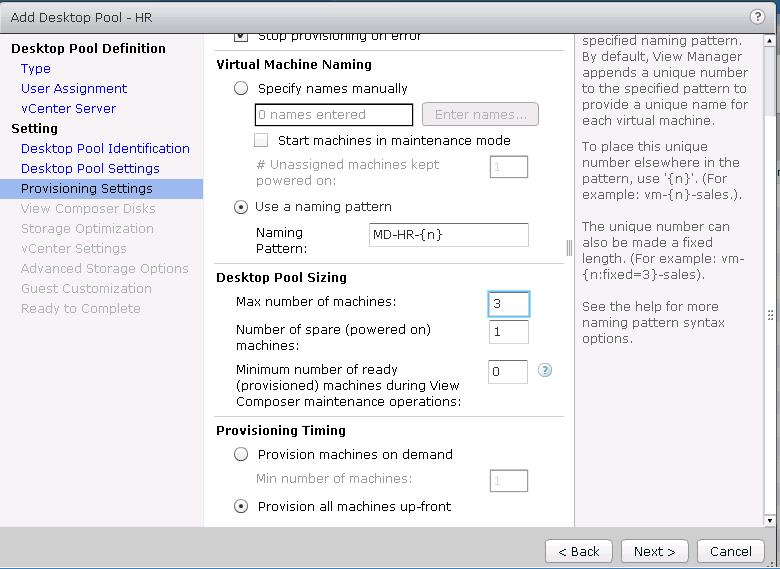
In the provisioning settings, choose use a naming pattern. Define the naming pattern for the virtual desktops which will be deployed as part of linked clones. You can also specify maximum number of machines for this desktop pool and click on Next.
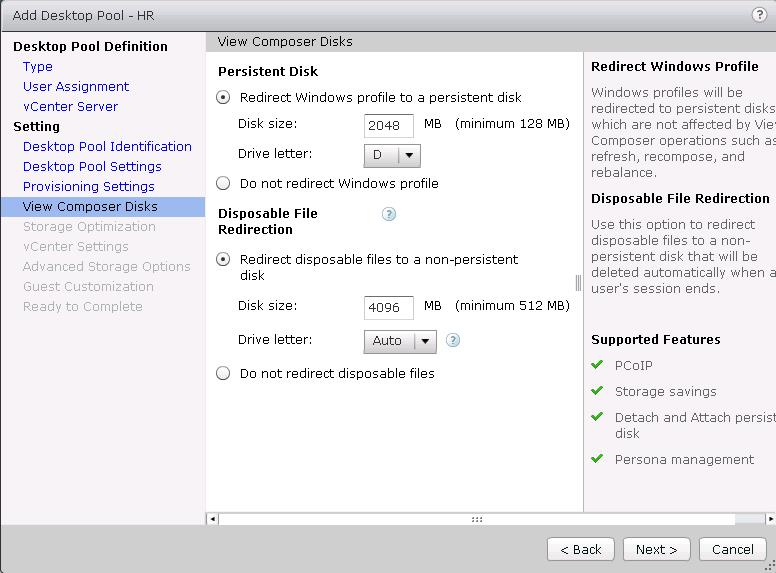
Configure View Composer Disks and click Next. Choose redirect windows profile to a persistent disk, this way users will experience same desktop every time they log on to their Desktop. Click on Next.
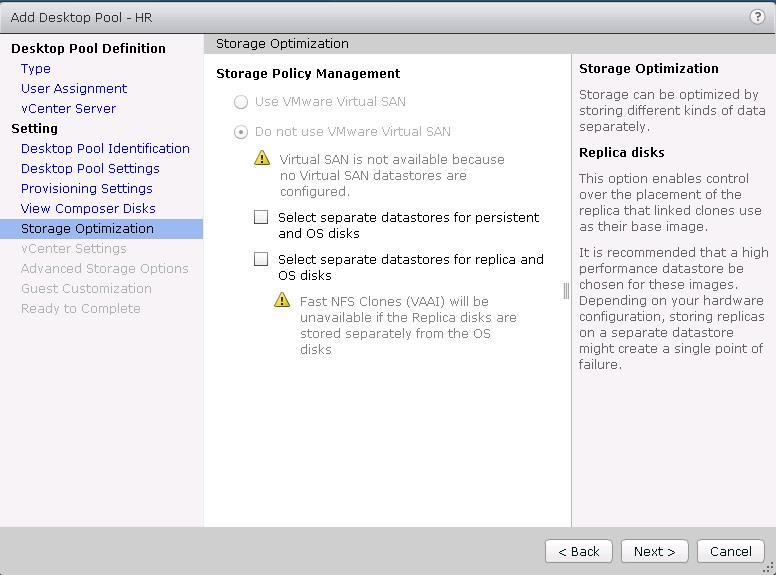
Review the storage policy and select the appropriate options which matches your organization needs. Click on Next.
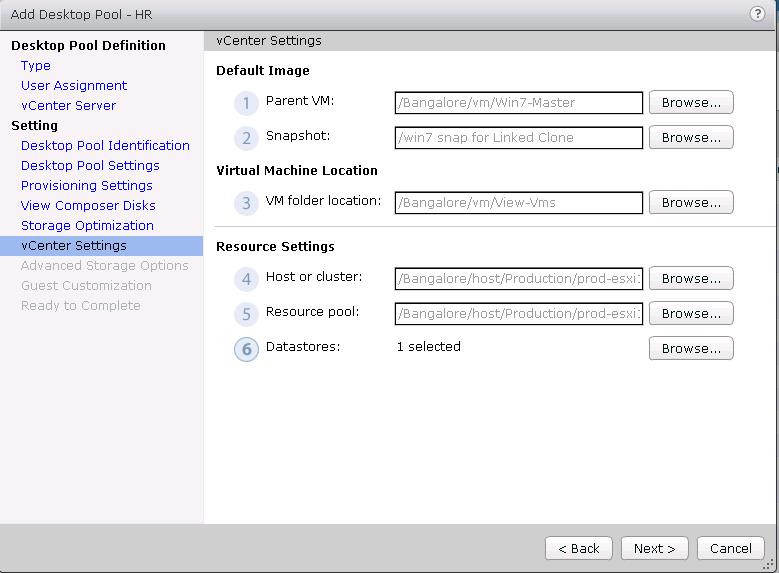
Select the below options under vCenter Settings and Click on Next.
- Browse the Parent VM and Select the parent VM (the master image we created previously)
- Browse the Snapshot and Select a snapshot which was created earlier (the VM must have been powered off when the snapshot was created)
- Select the folder the VMs should be created within
- Select the cluster and resource pool the desktops within the pool should be provisioned within
- Select the datastore(s) for the linked clone disks and the datastore for the replica disk
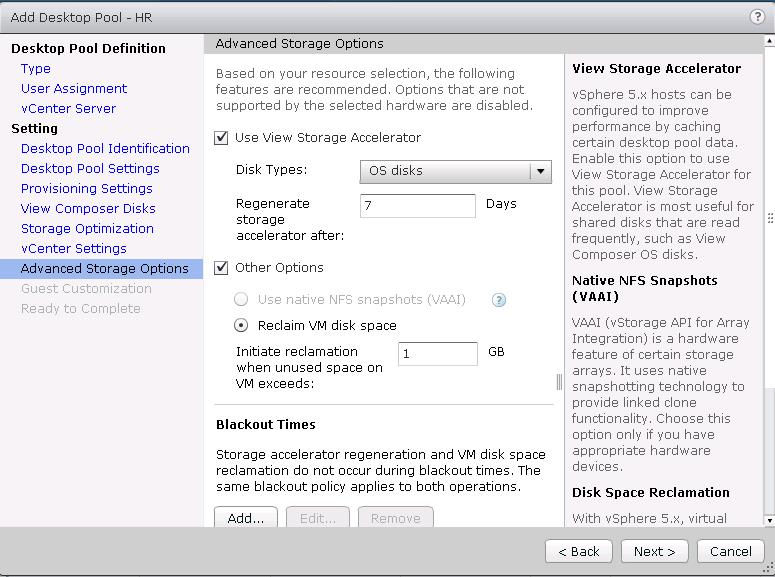
Enable View Storage Accelerator and click on next.
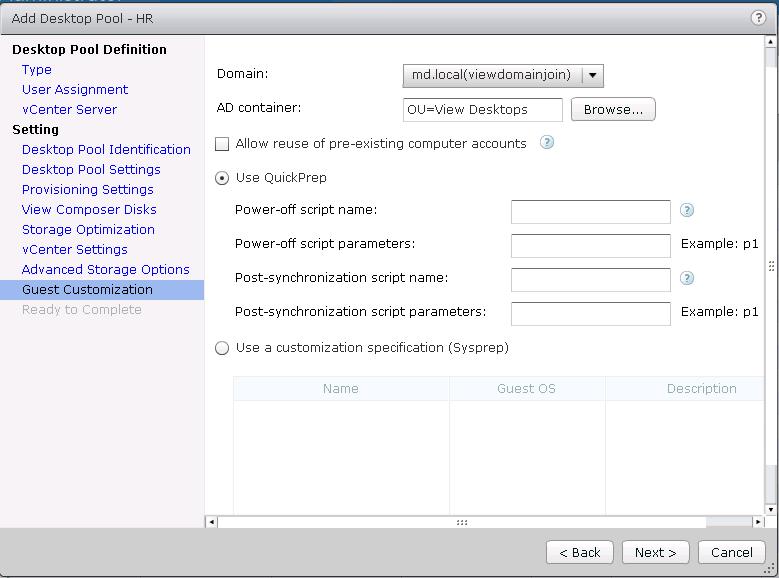
Select the domain and OU which the virtual desktops should be joined to and placed within. Click on Next.
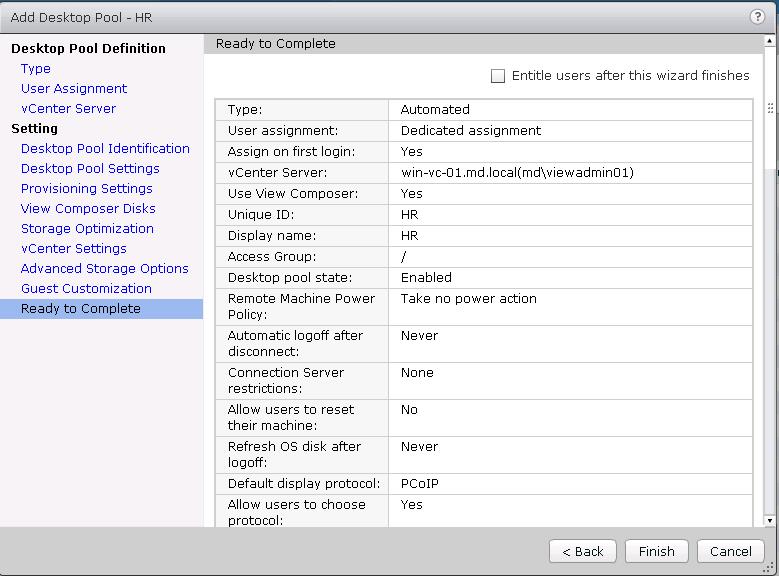
Review the desktop pool settings and Click on finish to start creation of Linked Clone desktop pool.
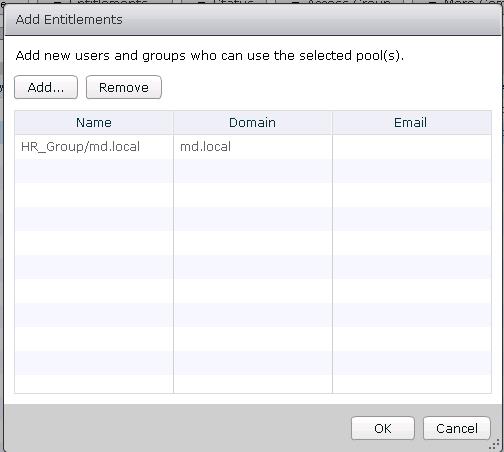
Once Linked Clone desktop pool “HR” is created . Select the desktop pool and Choose Add entitlement under Entitlements.
Entitle the require users to the desktop pool by adding the AD users or groups when the entitlement dialog is displayed after the wizard closes.
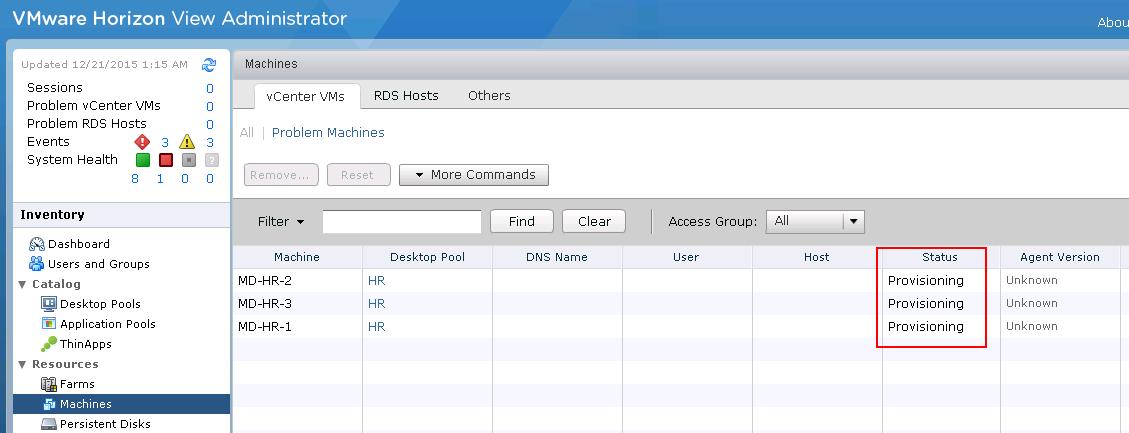
Once the linked clone pool is created. Notice the desktops in the pool have a status of “Provisioning”, this is because vCenter is currently creating the replica and linked clones.
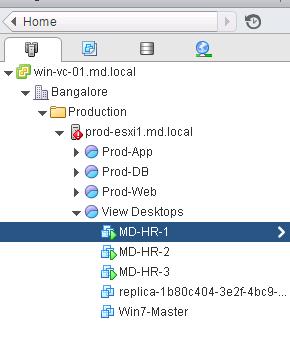
From the vCenter server inventory, you can notice that Linked clone desktops (MD-HR-1,2 & 3) and also replica desktops created under the inventory.
That’s it. We are done with deploying the linked clones desktop pool. I hope this is informative for you. Thanks for Reading!!!. Be social and share it in social media, if you feel worth sharing it.
Horizon View 6 Related Articles:
VMware VDI – Horizon View Overview & Components
VMware Horizon 6 – Install View Connection Server
VMware Horizon 6.x – View Composer Installation
Create ODBC Connection for VMware Horizon View Composer Installation
Horizon view licensing – Overview and Configuration
Configuring VMware Horizon View Administrartor – Virtual Desktop Infrastructure
Configuring VMware Horizon View Event Database
VMware View Agent Download and Install on Win7 Master Image
Understanding VMware Virtual Desktop Pools – Horizon View 6
Creating Manual Desktop Pool -VMware Horizon View 6.x
Creating Linked Clone Desktop Pools in VMware Horizon View 6.X
Install Remote Desktop Session Host to Setup RDS Host Farm in Horizon View
VMware View Agent Installation on Remote Desktop Session Host
Creating Remote Desktop Session Host Farm in VMware Horizon View
Creating RDS Hosted application pools in VMware Horizon View


